
Refresh Old Appliances with Appliance Paint
Kitchen updates are one of the costlier home projects, yet it may also be the one that makes your house a home. Before you start swinging the hammer, consider whether what you really need is just a cosmetic update. A fresh coat of paint can do wonders for any space, and that includes one of the most expensive parts of the kitchen: your appliances.
Plus, throwing out appliances that are a little dated but work fine just may not be something you really want to do. Even if you do plan on new appliances, with the current supply-chain disruptions, you many need to place an order for what you want. Painting your existing appliances is a great way to get the look you want while you wait. That’s why appliance paint is an excellent solution to this problem.
What Paint Do You Need?
The type of paint you need depends on the appliance you’re painting. You can’t just use any leftover paint you find in your basement or garage. Appliance paint is an epoxy-based enamel paint which helps achieve a glossy exterior for your refreshed appliance and is made up of two main components—resin and hardener that helps it adhere to appliance surfaces.
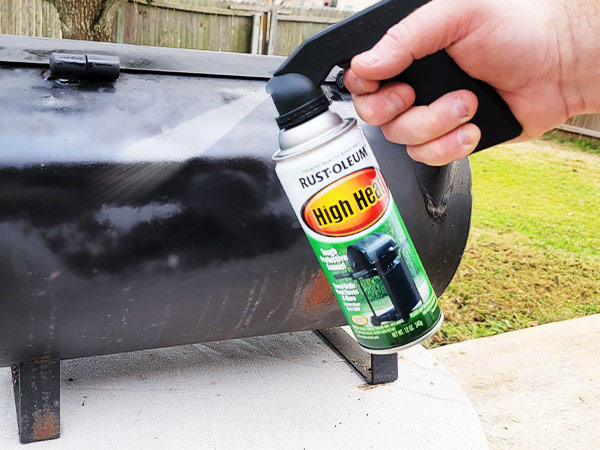
Appliance epoxy paint is perfect for your indoor and outdoor appliances. This includes things like refrigerators, microwaves, and grills. For machines that can get wet, make sure to buy appliance epoxy paint with moisture resistance capabilities. Use heat-resistant epoxy paint for appliances that can get hot like ovens, stoves, and radiators.


Getting Ready to Paint
Just as with any painting project, things can get messy. Protect your floor and countertops with a drop cloth that’s large enough to cover a few feet in each direction from your appliance. Paint in a well-ventilated area or outside to prevent paint fumes from building up.
After you prepare the area, you can prep the appliance. Thoroughly clean the surface to remove any stains, grease, or sticky areas that can mess up the paint adherence and affect the finish.
Use 120-grit sandpaper or a sand sponge for sanding the surface to help the paint stick. After sanding, remove dust with a damp towel, then let the appliance fully dry before you start to paint.
For a better finish, remove handles and hinges to avoid paint mishaps. Clean and reattach them after you’re done. In cases where you can’t remove them, carefully cover them with painter's tape.

How to Paint Your Appliances
You can paint appliances using a mini roller, brush, or by spray painting. Spray painting is usually best as it’s often easier and requires less skill, making it perfect for beginners. When you spray paint, hold the can upright 8-12 inches from the surface. Before spraying, shake the can for 15-30 seconds to thoroughly mix the paint. Spray light coats and go from a left to right position as you spray. You may want to invest in a spray paint can grip that makes spray painting easier on your fingers. Switch directions after each coat to achieve an even coverage.

Use long, even strokes across the surface area when you use a brush or roller. Dip to 1/2 the bristle length to get the right amount of paint and don’t put too much pressure on the brush. If using a mini-roller, avoid dunking the roller into the paint but dip gently. Too little paint won’t give you enough for long strokes, and too much paint can cause it to drip down.
![]() For patterns or designs, use painter’s tape to cover up the areas you don’t want to be painted.
For patterns or designs, use painter’s tape to cover up the areas you don’t want to be painted.
For a smooth finish, it’s vital to apply the right number of coats, so use three coats when spray painting and two if you’re using a brush or roller. Allow anywhere from 30 minutes to two hours to dry for each coat, depending on the instructions of your paint material. The humidity levels and temperature in your space can also have an impact on drying time. Make sure the paint is dry by touching an inconspicuous area with your fingertip before you apply another layer.
Once you finish painting the entire appliance, let it sit for at least 24 hours before you move it to ensure the paint is fully cured and to minimize the risk of damaging the fresh paint.
Shop Appliance Paint at McCoy's
Still not sure you’re ready to tackle a project like this? Don’t worry! You can stop by your local McCoy’s and we’ll be happy to help you find just what you need to make your project a success.
